Sending Hours
Customise your sending schedule, block out restricted dates, and enjoy flexible overrides for urgent messages.
Navigation
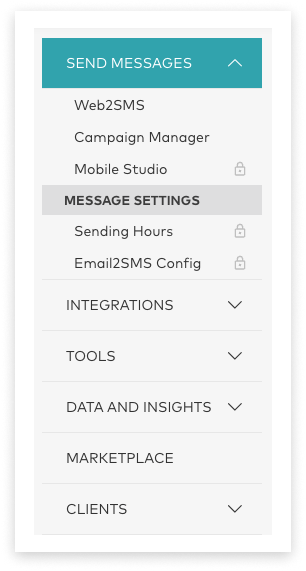
Sending Hours can be found under ‘Send Messages’ and ‘Message Settings’ in the side menu.
If it appears ’locked’ in the menu, then it is available to request by clicking the ‘Request This Product’ button.
Once provisioned, Sending Hours gives you complete control over when your messages reach your audience. Ensure communications are delivered only during appropriate times, respecting your customers’ schedules while maintaining business efficiency.
Overview
Overview tab – gives a quick look at the current state of your accounts, and allows for common actions to perform on an account’s sending.
Sending Hours tab – set and manage generic weekly schedules, or customise allowed-sending hours on a per-day basis.
Restricted Dates tab – block off specific days or date ranges during which no messages are allowed to be sent.
Audit tab – review user actions performed within the Restrict Sending Hours application.
Configure Sending Hours
Please use the navigation panes below to browse topics on configuring Sending Hours
Accounts Overview
Overview Tab
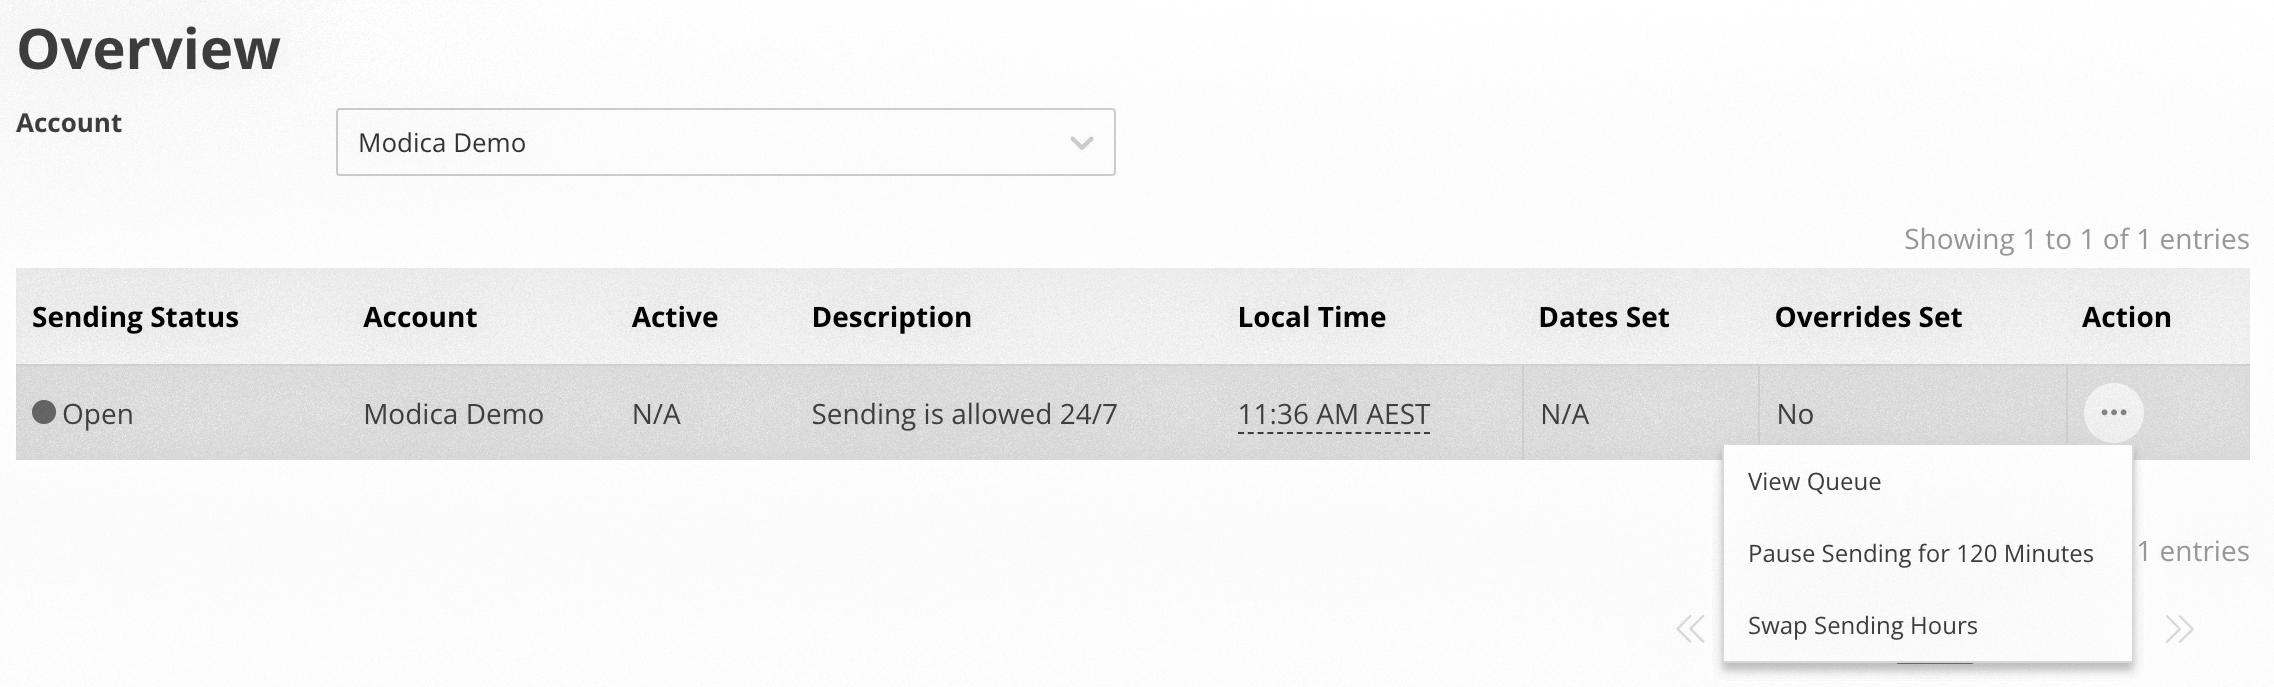
The overview page gives a concise look at the current state of your accounts and allows for common quick functions via the action menu.
Table Columns
| Setting | Explanation |
|---|---|
| Sending Status | Refers to the current sending state on an account
|
| Account | Represents the name (or identifier) of an account associated with the communication. |
| Active | The mode or configuration that the account is currently operating under. |
| Local Time | The time zone or region-specific time that has been set for the account. |
| Dates Set | Refers to the list of set Restricted Dates currently set/scheduled for an account |
| Overrides Set | Indicates whether or not there is an upcoming override for an account, or not. |
| Action Menu | The Action Menu provides access to a range of actions. These include pausing, viewing the queue, and swapping or removing configurations for an account. |
Manage Sending Schedules
Manage Sending Schedules
“Sending Hours” refers to a designated timeframe during which messages will send. These hours can be either generic weekly schedules or customised on a per-day basis.
Set Sending Hours
| Steps | Example |
|---|---|
| 1. Navigate to the Sending Hours Tab and click “Create Sending Hours” |  |
2. Configure the Name, Description, Allowed Hours and Account(s) and click save. Notes :
|
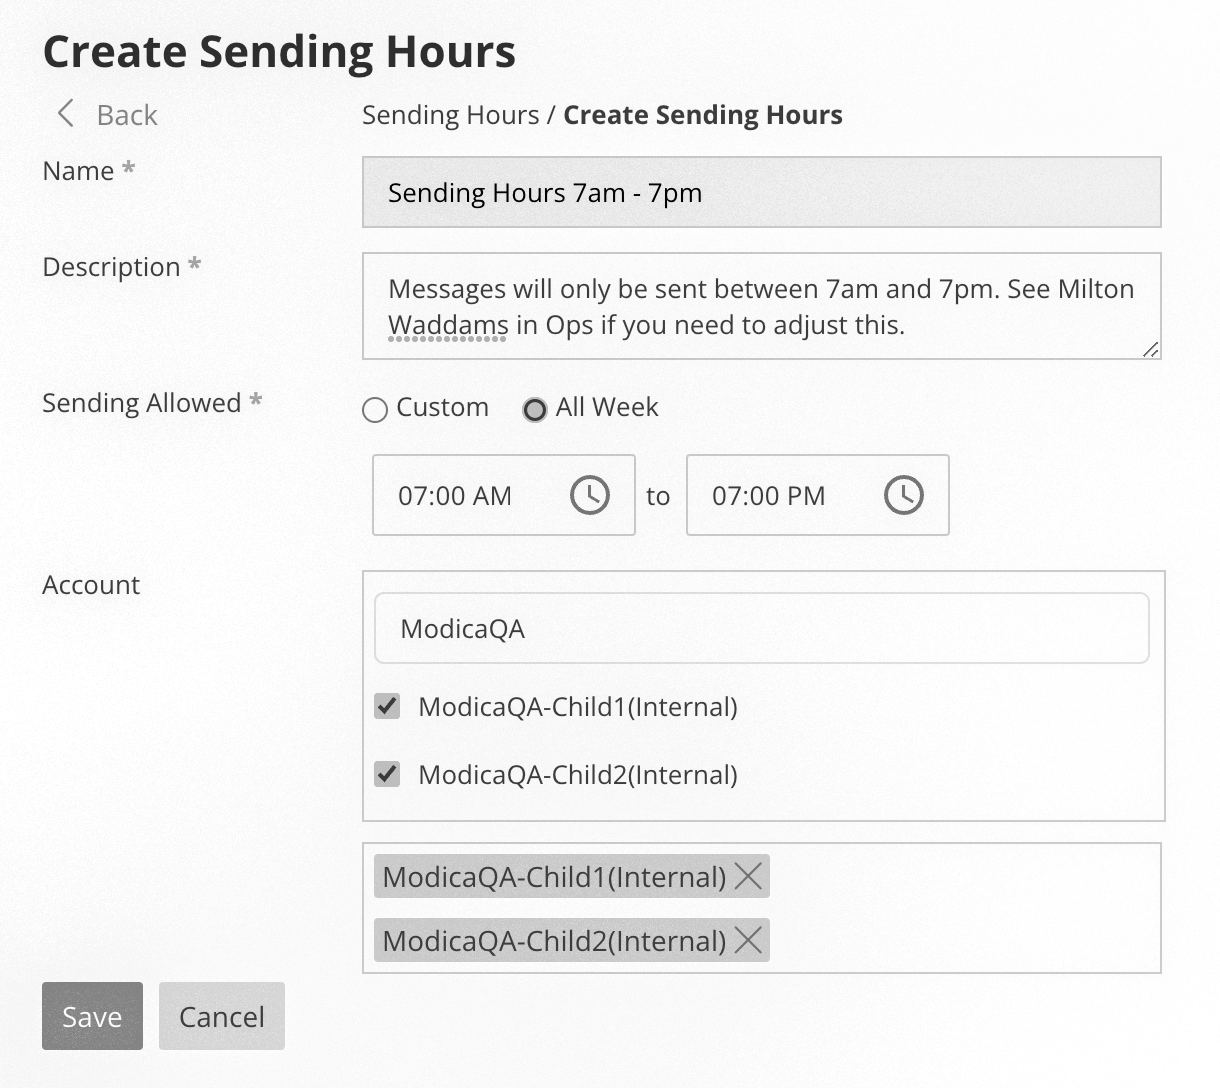 |
| 3. Sending Hours can be either generic weekly schedules or customised on a per-day basis. | Per week:  Per day: Per day: 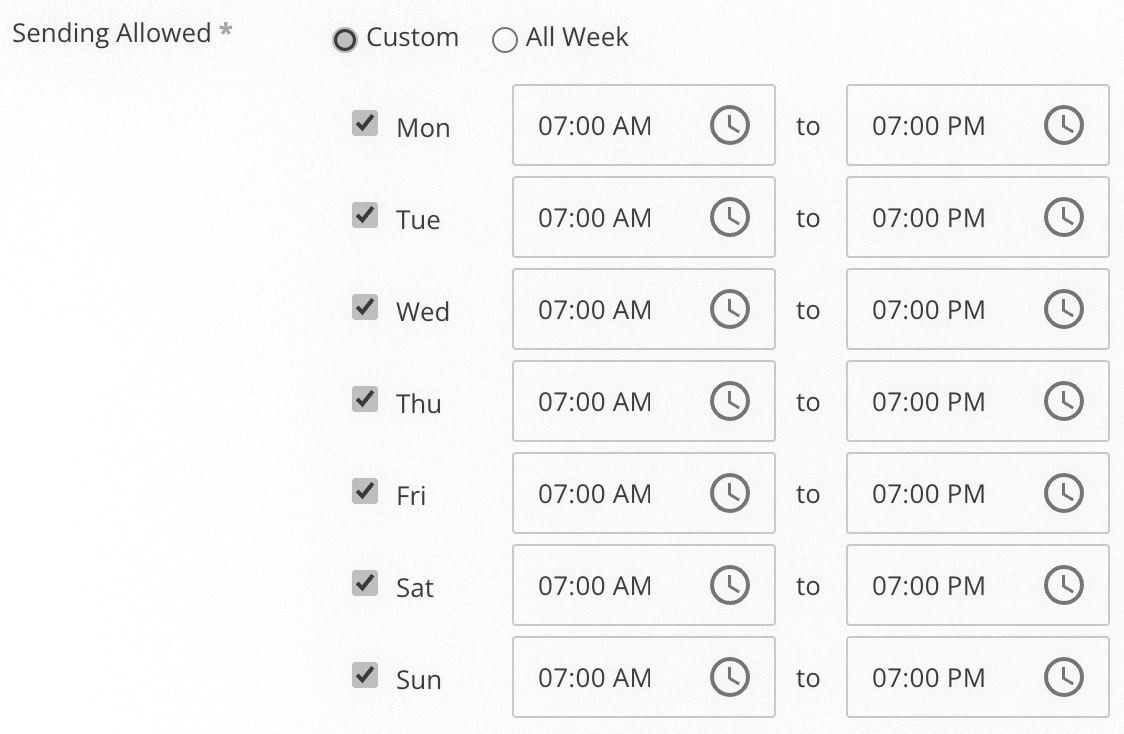 |
| 4. Save and Timezone confirmation | 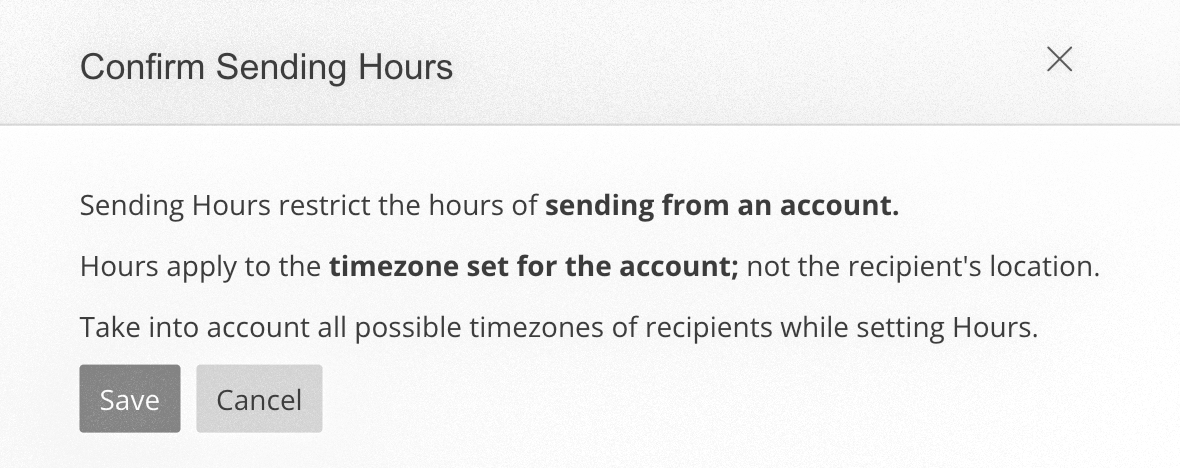 |
Edit a set of Sending Hours
| Steps | Example |
|---|---|
| 1. Navigate to the Sending Hours Tab and (via the Action menu) click Edit next to the relevant set of Sending Hours. |  |
2. Update the required Name, Description, Allowed Hours and Account(s) and click save. Notes :
|
Delete a set of Sending Hours
| Steps | Example |
|---|---|
| 1. Navigate to the Sending Hours Tab and (via the Action menu) click ‘Delete’ next to the desired set of Sending Hours. |  |
| 2. Confirm and acknowledge that assigned accounts will revert to 24/7 sending. | 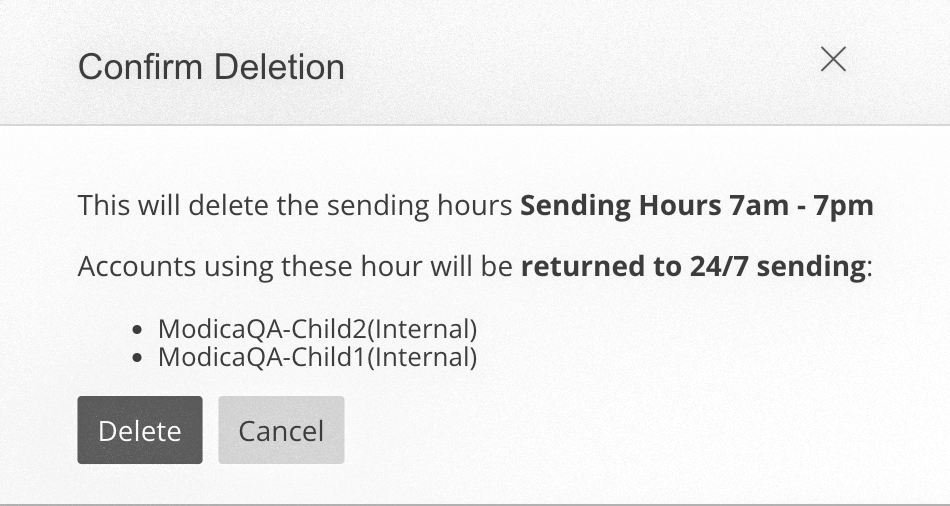 |
Manage Restricted Dates
Mange Restricted Dates
“Restricted Dates” are specific days or date ranges during which no messages will send. Once a Restricted Date ends, message processing will revert to the account’s assigned Sending Hours or resume 24/7 sending (as configured). If an account does not have Sending Hours configured, messages will be sent at 9am the following day.
Create a Restricted Date
| Steps | Example |
|---|---|
| 1. Navigate to the Restricted Dates Tab and click “Create Restricted Dates”. | 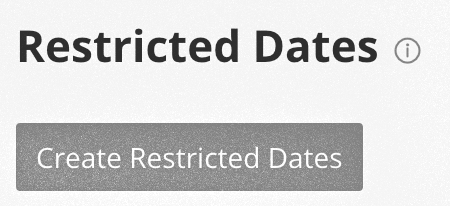 |
2. Configure the Name, Description, Allowed Hours and Account(s) and click save. Notes :
|
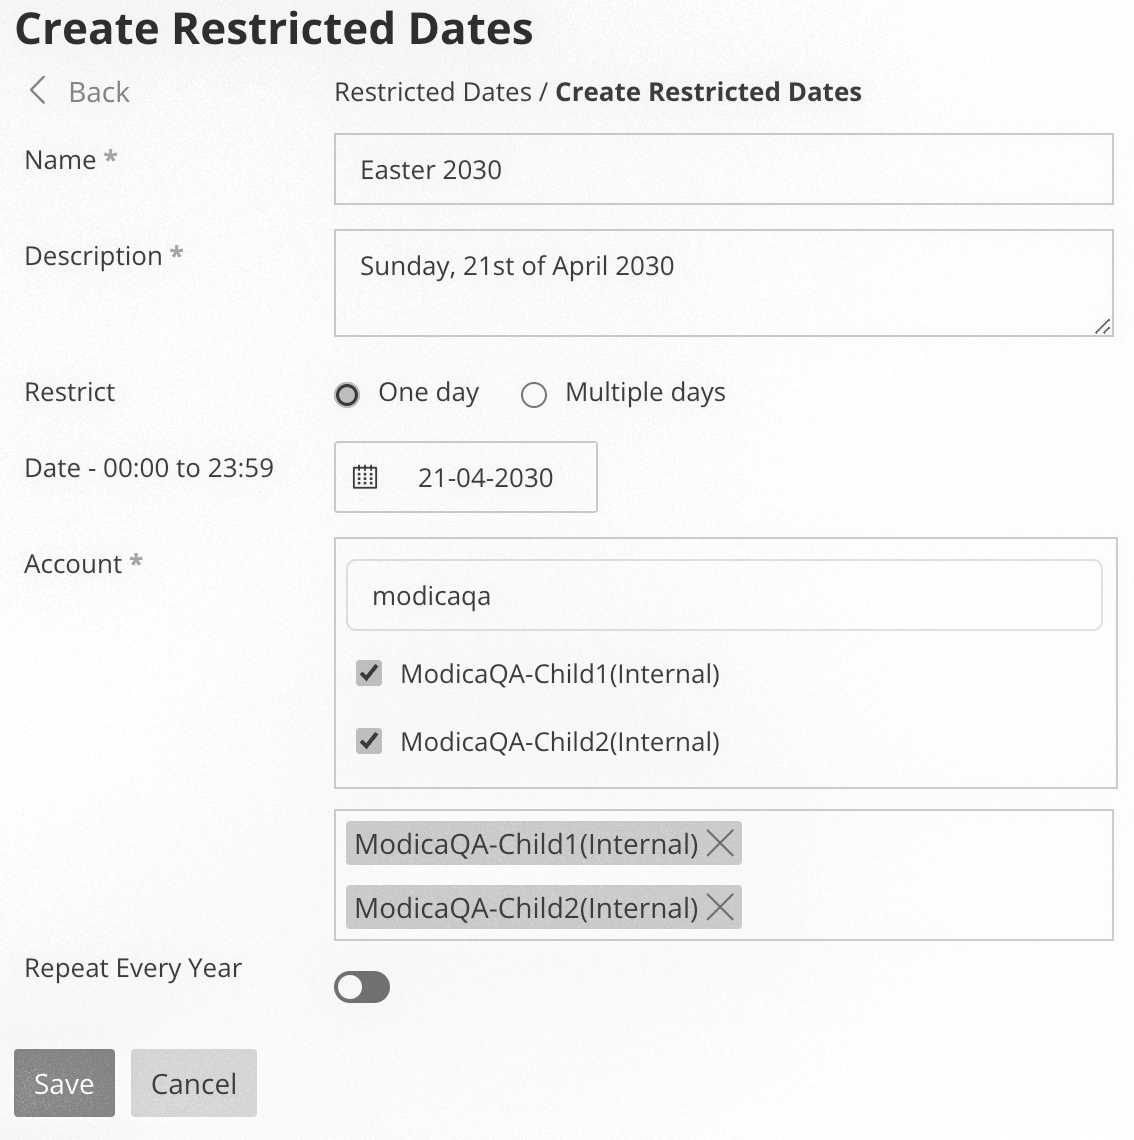 |
| 3. Save and Timezone confirmation | 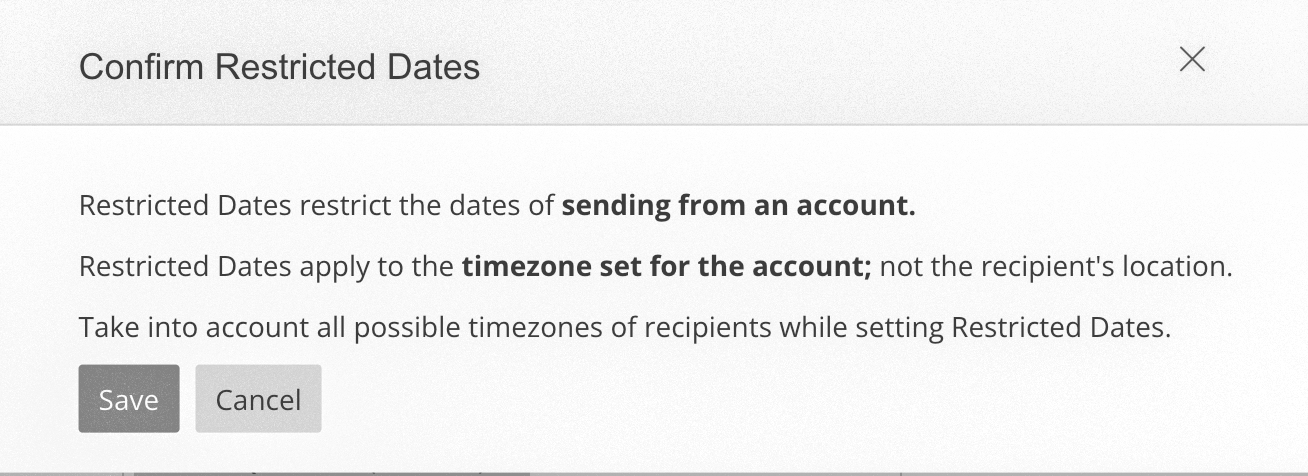 |
Edit a Restricted Date
| Steps | Example |
|---|---|
| 1. Navigate to the Restricted Dates tab and (via the Action menu) click Edit next to the relevant Restricted Date. |  |
2. Update the Name, Description, Allowed Hours and/or Account(s) and click save. Notes :
|
Delete a Restricted Date
| Steps | Example |
|---|---|
| 1. Navigate to the Restricted Dates tab and (Via the Action menu) click Delete for the selected Restricted Date. | |
| 2. Confirm and acknowledge that assigned accounts will revert to assigned Sending Hours or to 24/7 sending (as they are configured), on these dates. | 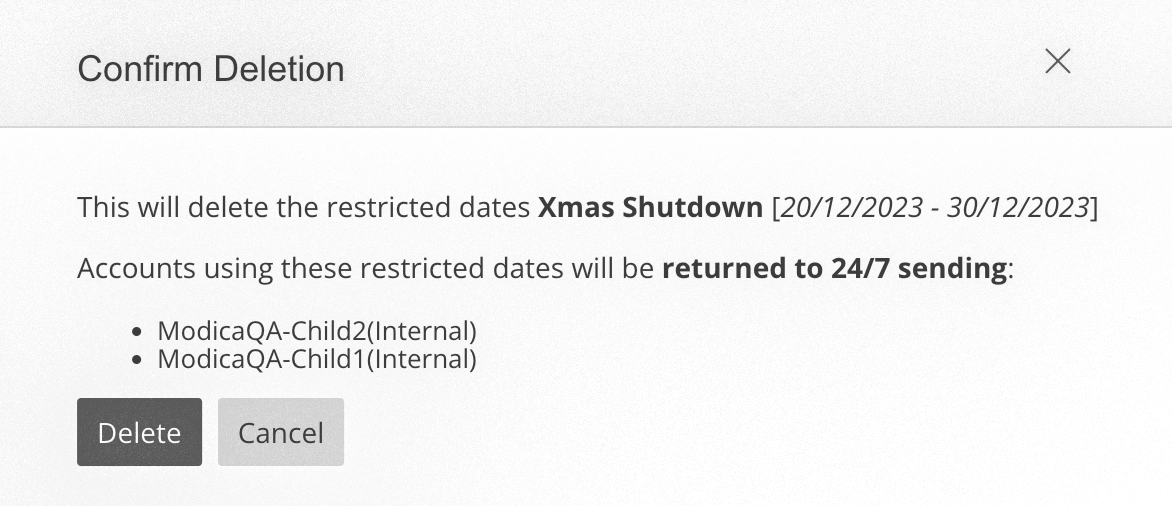 |
Operating Sending Hours
Please use the navigation panes below to browse topics on using Sending Hours.
Pause & Unpause Sending
Message processing can be paused and unpaused any time using the ‘Action’ menu.
Pause Sending
| Steps | Example |
|---|---|
|
 |
Unpause Sending
| Steps | Example |
|---|---|
|
 |
Extend a Pause
Extend a Pause
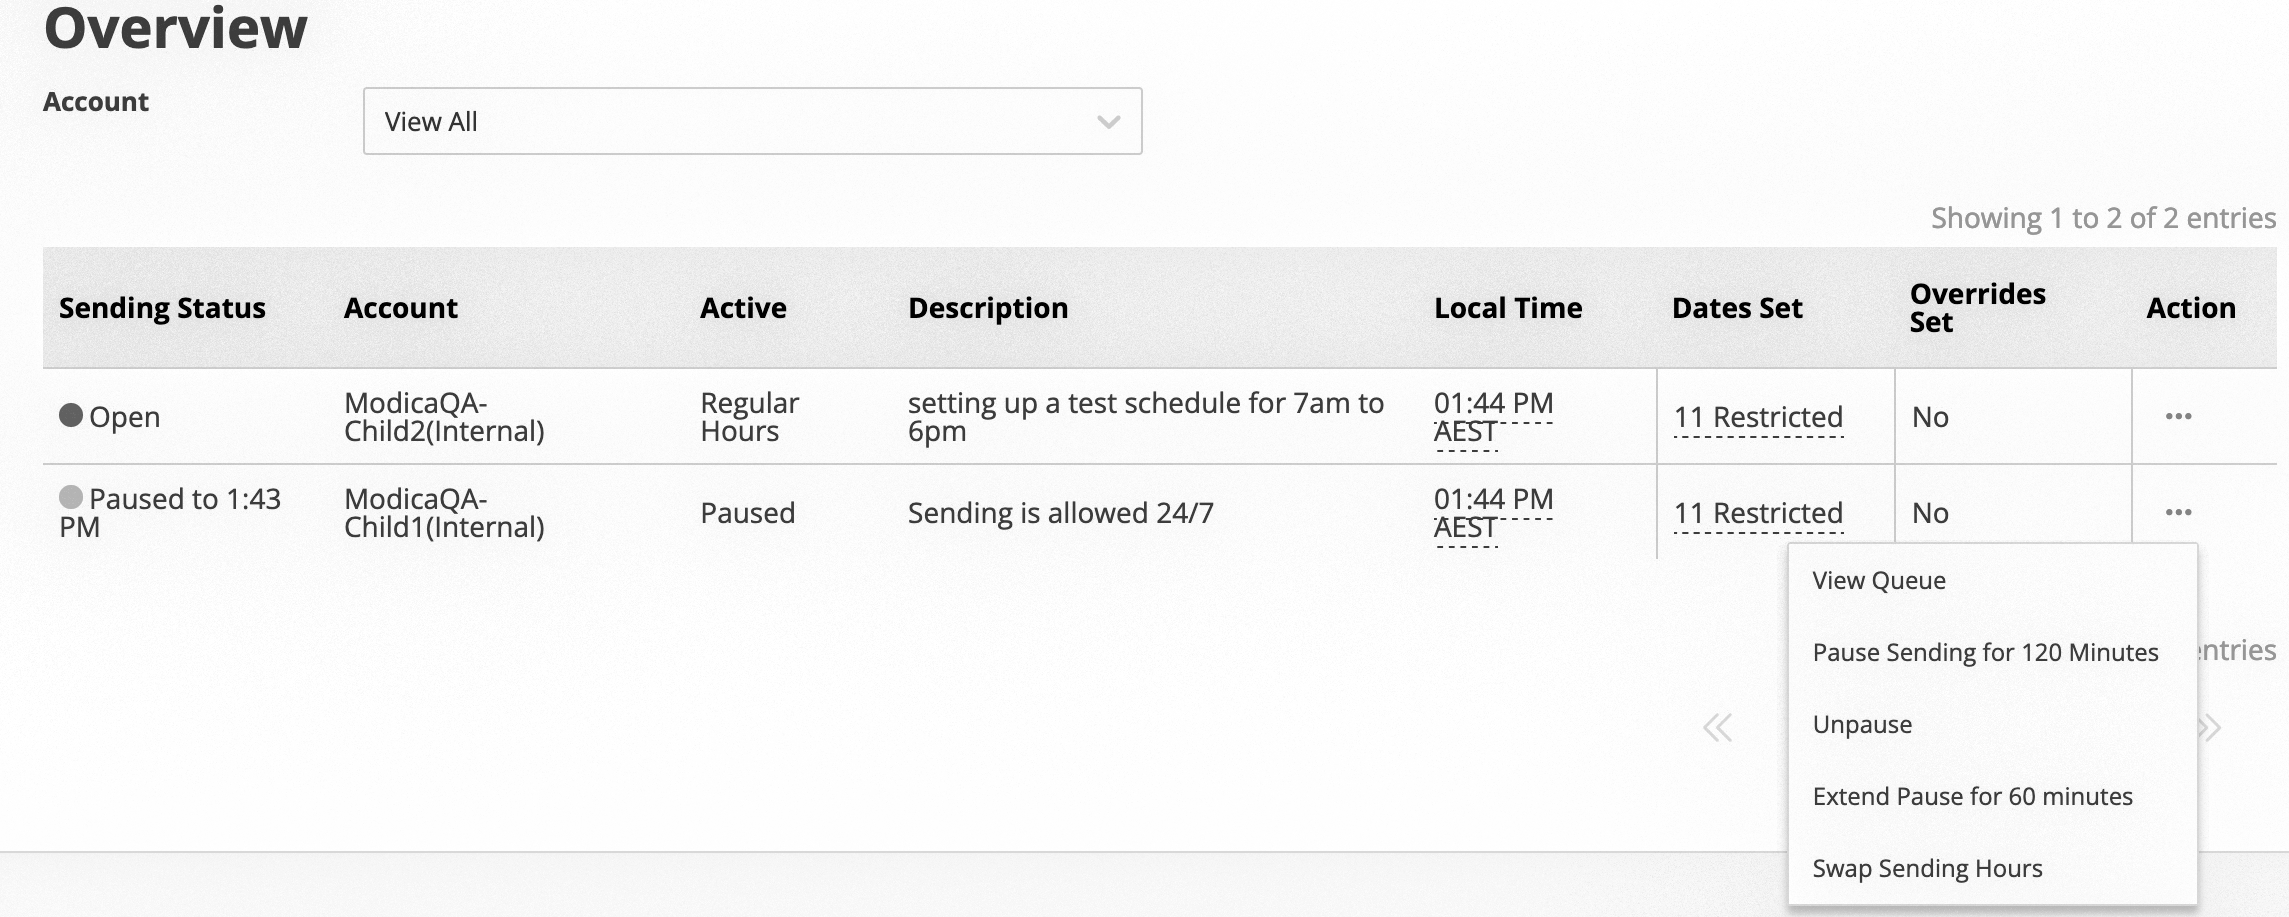
If more time is required, a pause can be extended by using the ‘Action’ menu.
Add 60 minutes to Account Pause timer
| Steps | Example |
|---|---|
|
|
Swap Sending Hours
Swap Sending Hours
The allowed Sending Hours assigned to an account can be swapped at any time via the ‘Action Menu’. Once swapped, accounts will instantly reflect the new Sending Hours.
| Steps | Example |
|---|---|
| 1. Navigate to the Overview tab and find the required account. 2. Click ‘Swap Sending Hours’ from the Action menu | 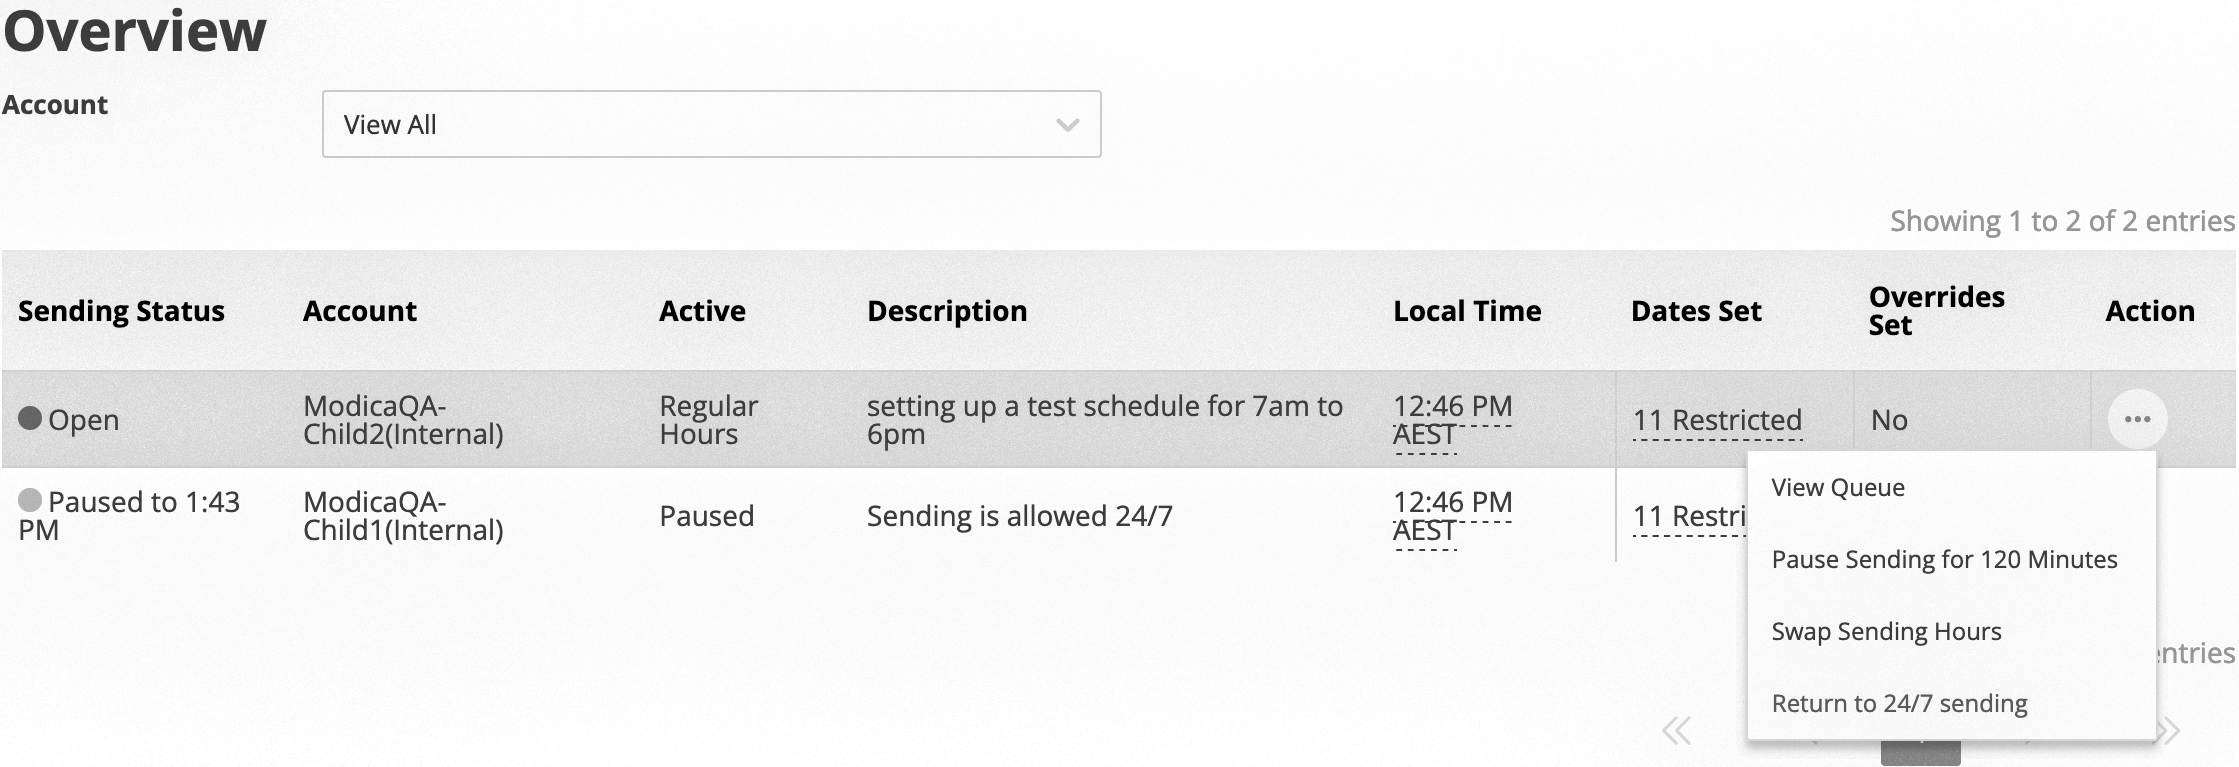 |
| 3. Select the new set of Sending Hours to swap to from the menu, and click ‘Save’ to apply the new schedule. | 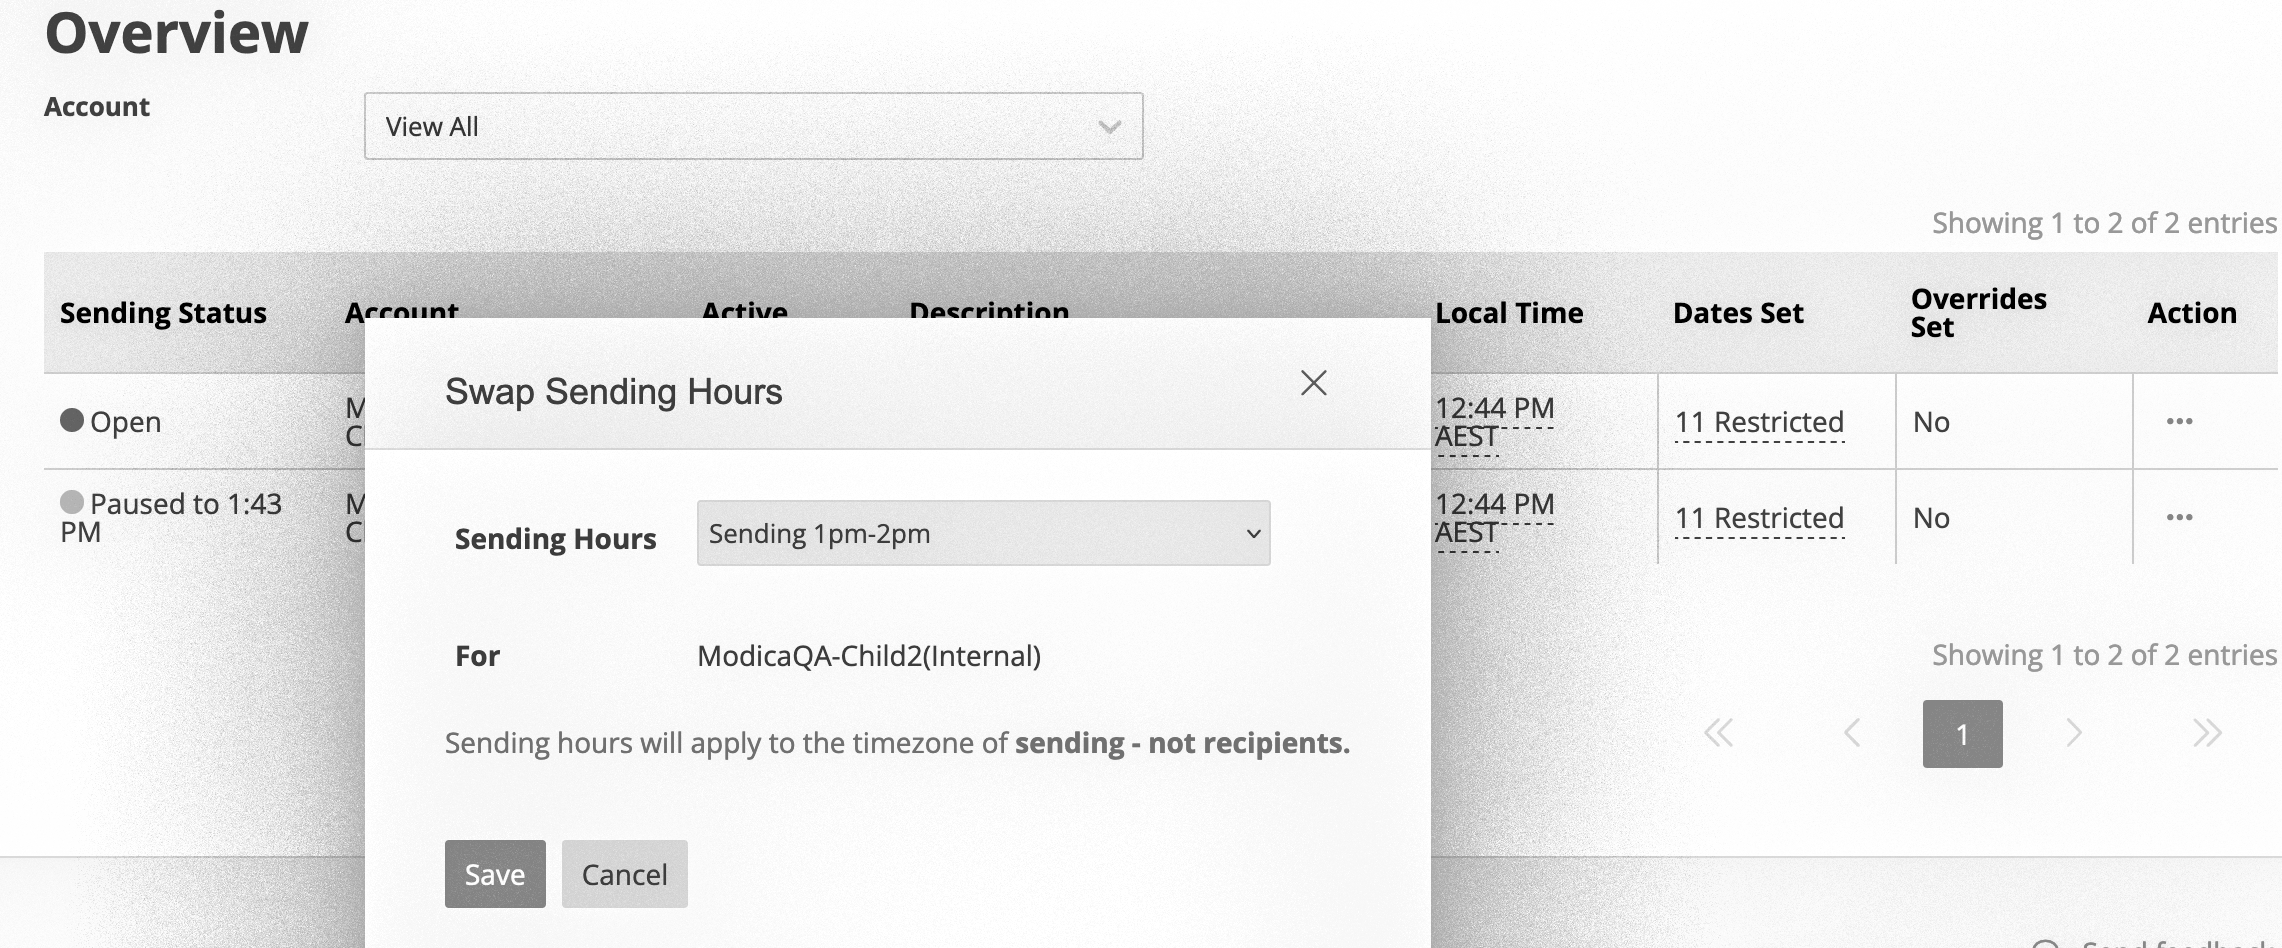 |
Return to 24/7 Sending
Return to 24/7 Sending
Assigned Sending Hours can be removed at any time by using the ‘Action Menu’ in the Overview tab. Once removed all applications which belong to the affected account will revert sending 24/7.
| Steps | Example |
|---|---|
| 1. Navigate to the Overview tab and find the required account. 2. Click ‘Return to 24/7 sending’ from the Action menu. |  |
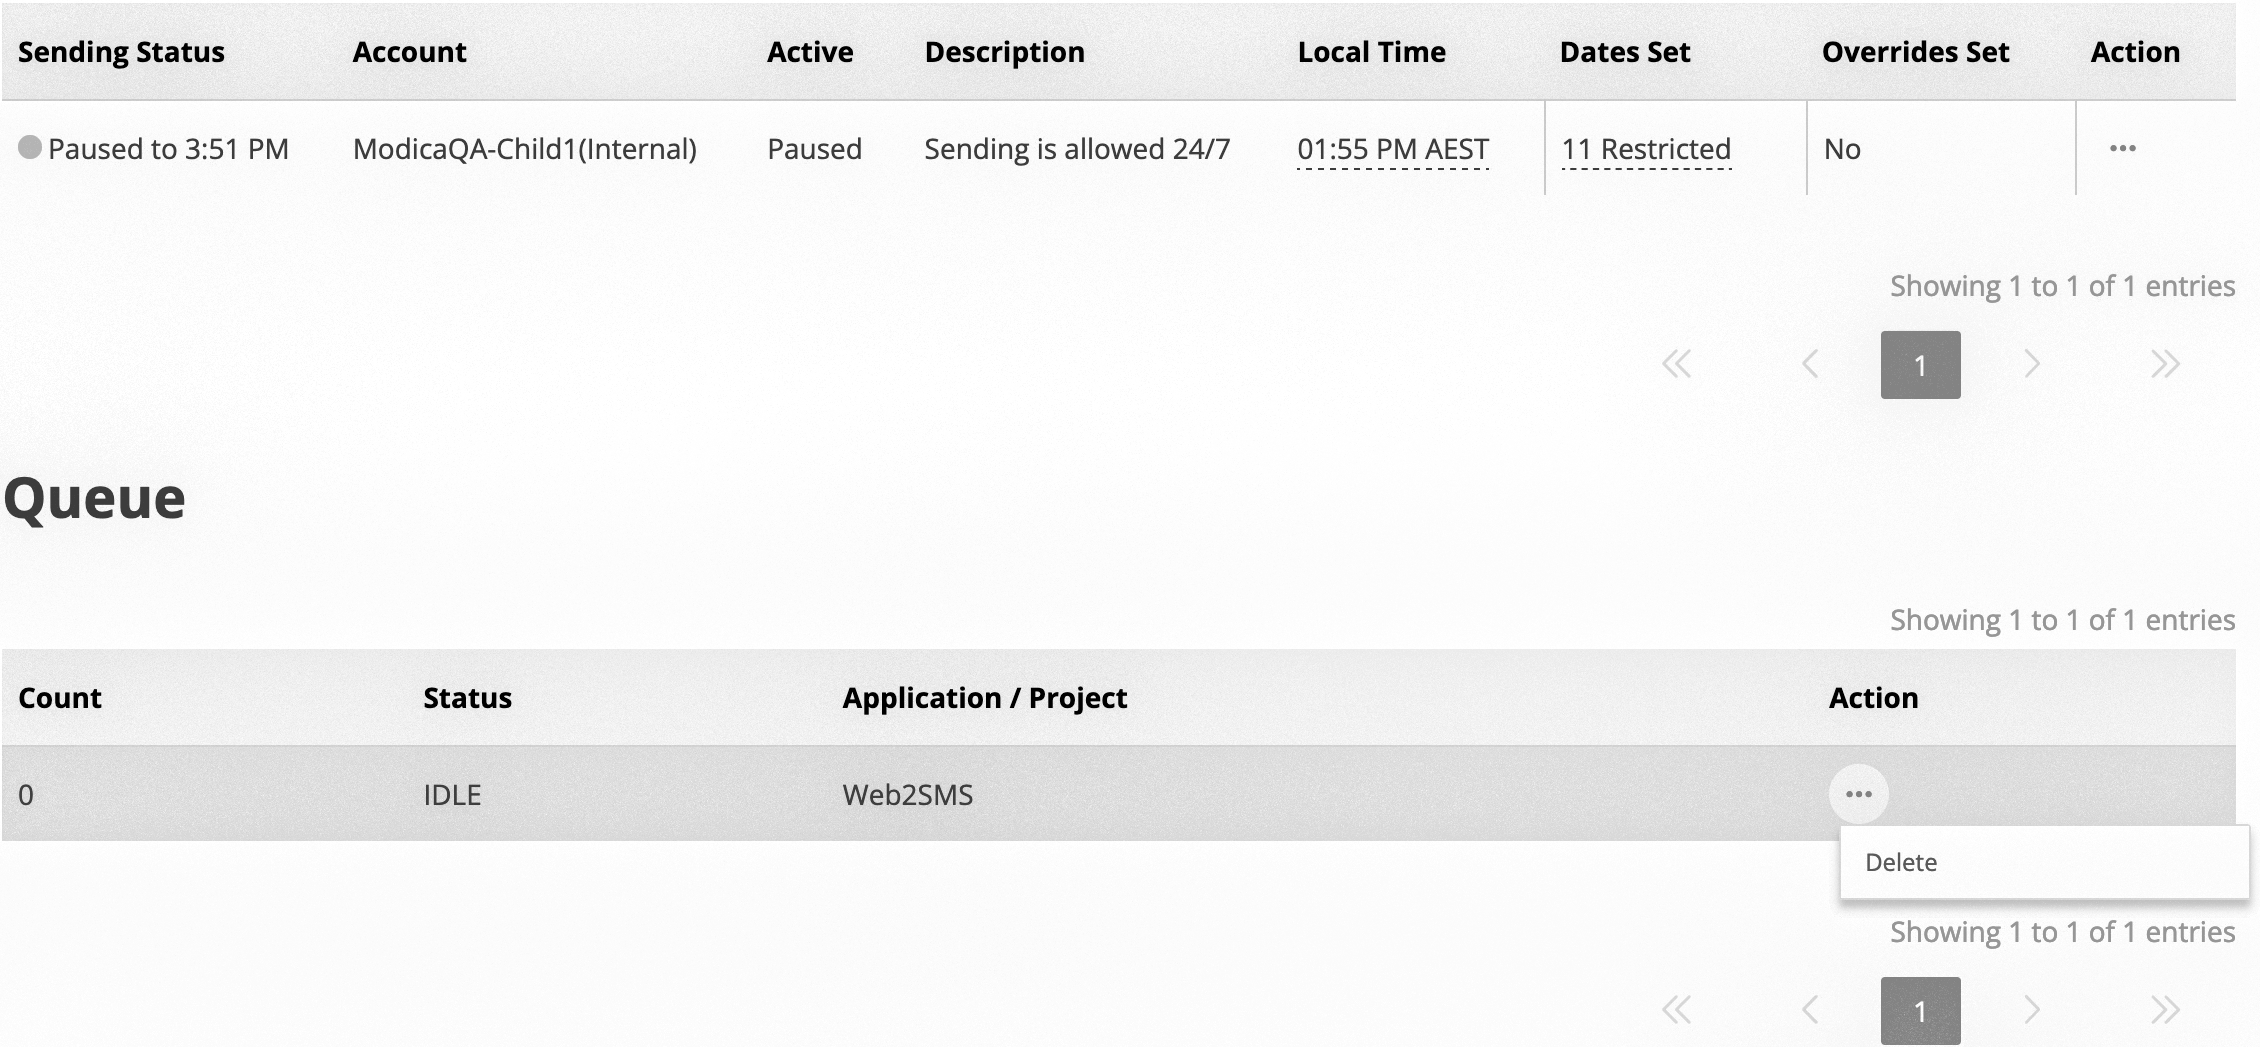
Delete Queued Messages
Delete Queued Messages
In-flight messages can be prevented from being sent if an account is paused. While paused, any messages received will be held in a queue until the next Sending Hours commence. Any queued messages can be deleted.
| Steps | Example |
|---|---|
| 1. Navigate to the Overview tab and find the required Closed or Paused account. 2. Click ‘View Queue’ from the Action menu. | 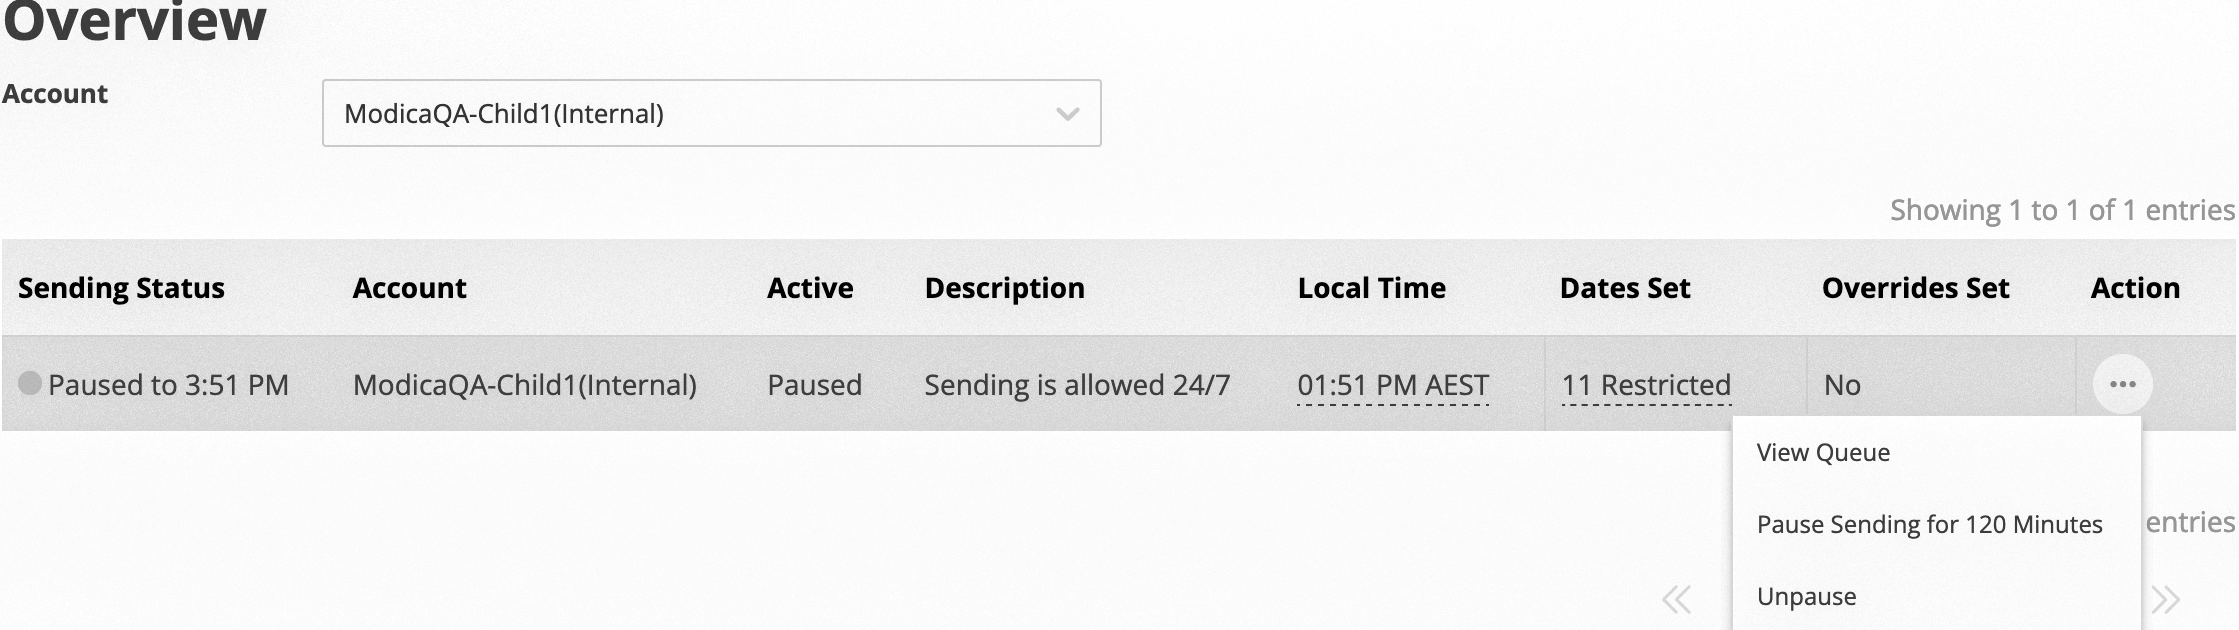 |
3. Locate the Application/Project or message Queue to delete from. 4. Click ‘Delete’ from the ‘Action Menu’. 5. The queue Count and Status will update every 30 seconds, as messages delete. Notes:
|
 |
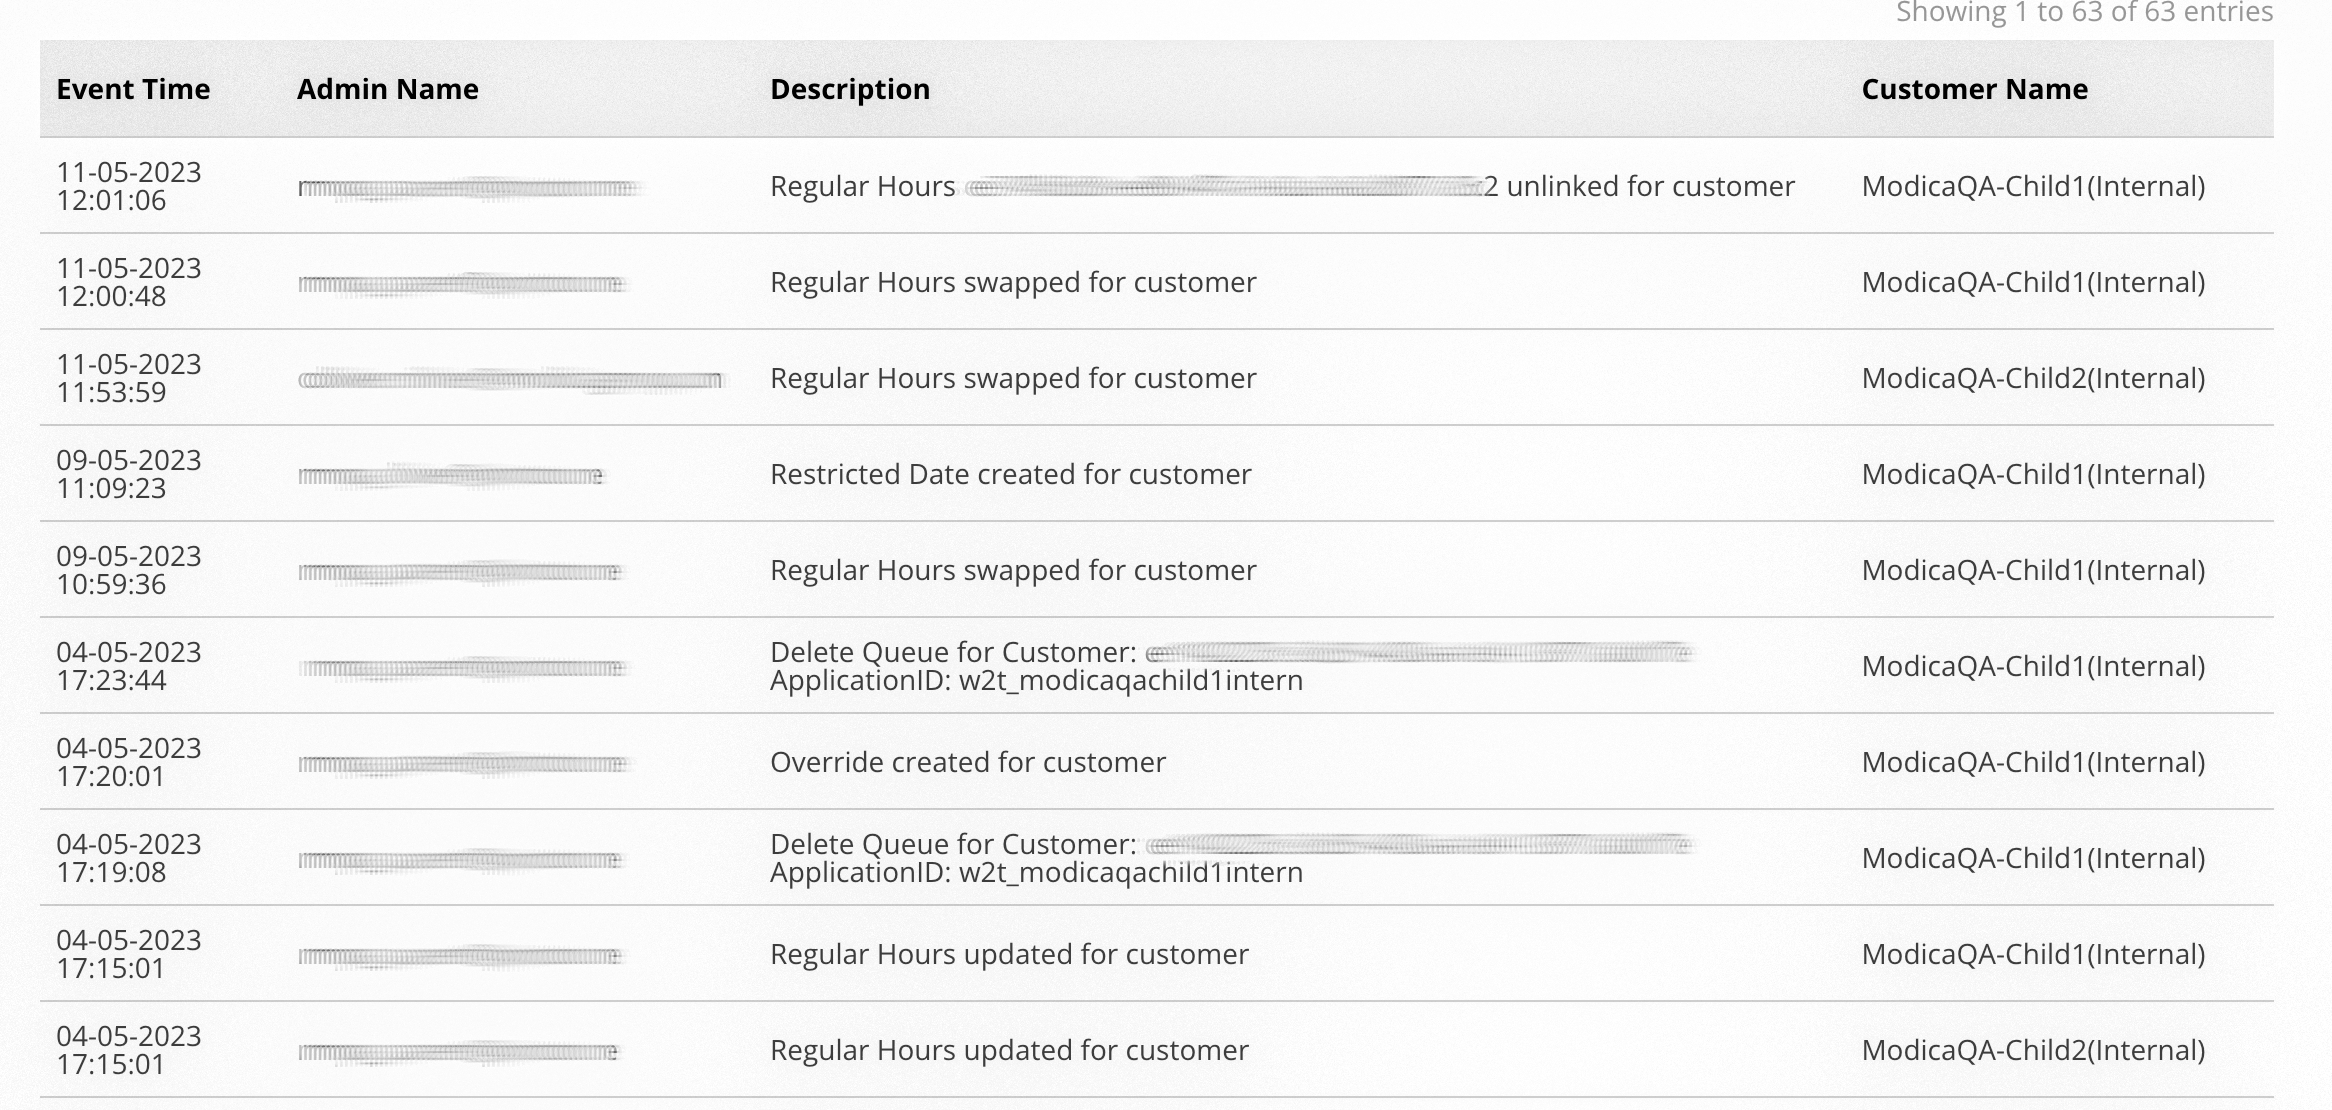
View Audit Log
View Autit Logs
The Audit section shows a history of configuration changes made.
| Steps | Example |
|---|---|
To view a history of configuration changes to your configuration, navigate to the Audit tab. You can view:
|
 |