Mobile Studio
Welcome to Mobile Studio where you can create automated messages for when recipients send you a particular keyword.
Mobile Studio specialises in managing and responding to your inbound messaging traffic. Our platform streamlines how your business handles incoming messages through automated responses to custom keywords, forwarding options, and comprehensive reporting.
Start Sending Now
It’s just 3 steps between you and the power of automated responses!
- Add your first keyword and craft a response
- Set up a fallback response for messages with unrecognised keywords
- Promote your keyword and start receiving inbound traffic!
Navigation
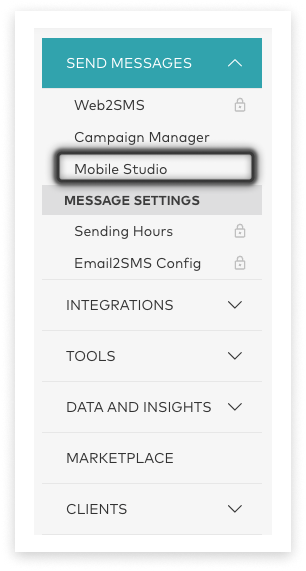
Mobile Studio is located under ‘Send Messages’ in the side menu.
If Mobile Studio appears ’locked’, it is available to request by clicking the ‘Request This Product’ button.
Response Messages
Mobile Studio specialises in managing and responding to your inbound messaging traffic. Our platform streamlines how your business handles incoming messages through automated responses to custom keywords, forwarding options, and comprehensive reporting.
For a Specific Keyword
To get started, you’ll need to decide your first keyword and the automatic response that will be generated when users send an SMS with it.
Click on the Keywords/Responses tab. Then select the plus sign on the right side of the screen.
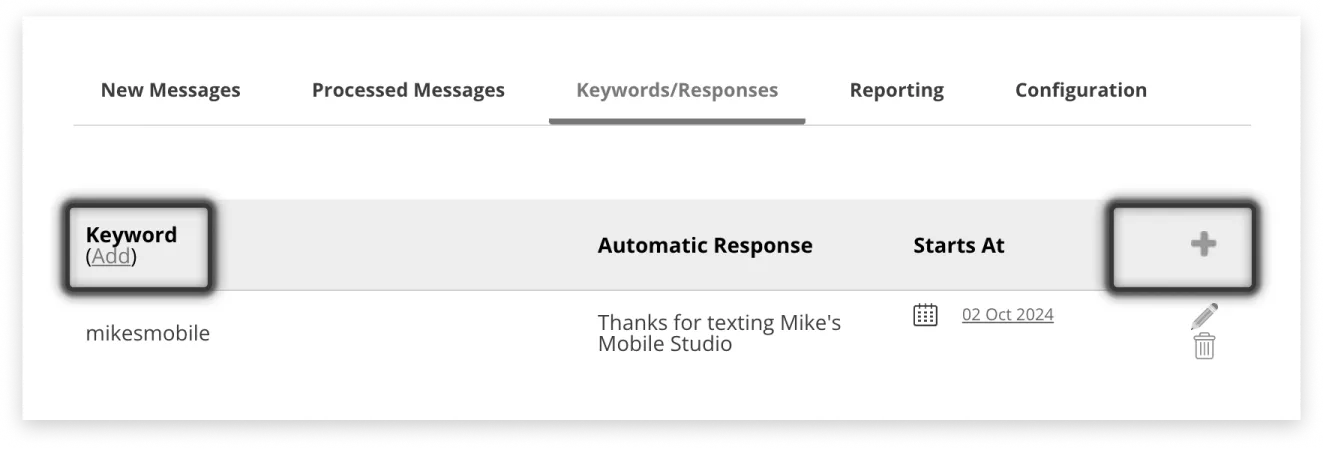
Fill in your new keyword and the automatic response you want it to generate.
Keywords can:
- Be single word, e.g. ‘keyword’,
- Be words that include a space, e.g. ‘key word’
- Contain a hyphen, e.g. ‘key-word’
- Be a short phrase, e.g ’lots of keywords’
These keywords will still need to be at the start of an incoming message to be recognised. The system won’t pick them out of the middle of a message, and they need to be an exact match to trigger a response.
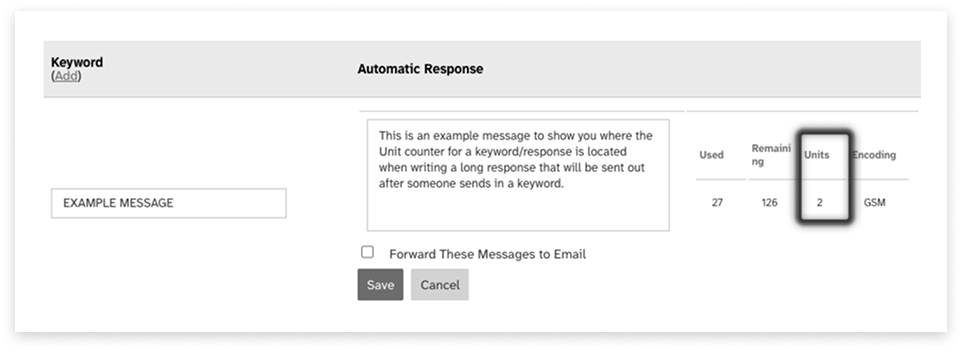
Your reply message can be longer than a single message if the information you need to return contains a lot of detail. The Unit counter on the right of the Response field lets you know how many Units will be charged.
Note: If your message is longer than 160 characters, you’ll see a notice explaining that you’ll be charged twice per message.
You can find out more about Character Limits here
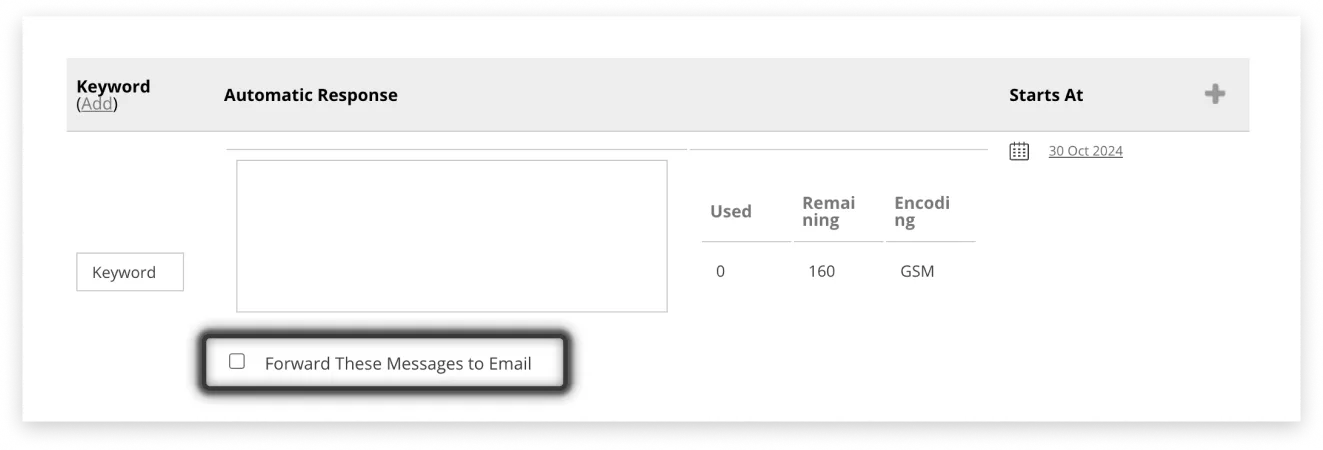
If you want to forward the message from that keyword to a specific email address tick the “Forward These Messages to Email” and add the email address in the empty field beside it. This field is limited to only one email address.
When you configure the Keyword level email address as well as the Application level email address it will be sent to both email addresses.
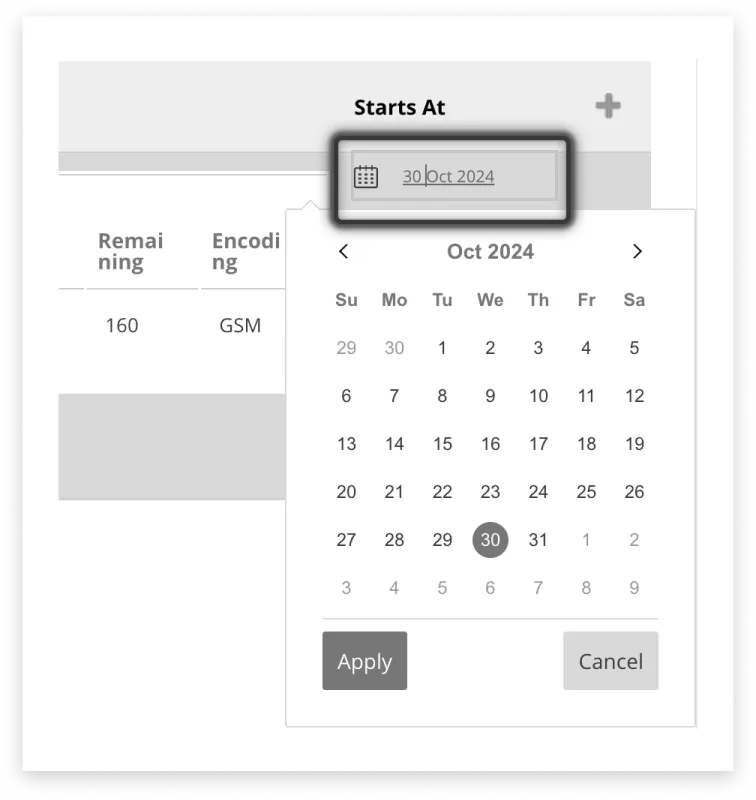
Back in the Keywords tab - under the ‘Starts At’ column, select the date that you want your Automatic Response to begin sending from. Click the ‘Save’ button to save your changes.
For an Unrecognised Keyword
Sometimes recipients might send you a message without a keyword that you’ve set an automatic response for. This feature comes in handy for those types of situations.
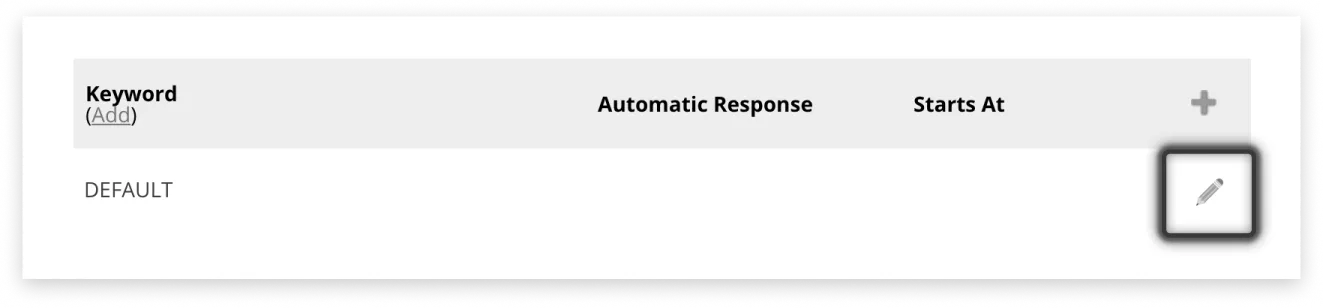
Click on the Keywords/Responses tab.
At the bottom of the page will be a keyword named ‘DEFAULT’. Click the yellow pencil in the far right column.
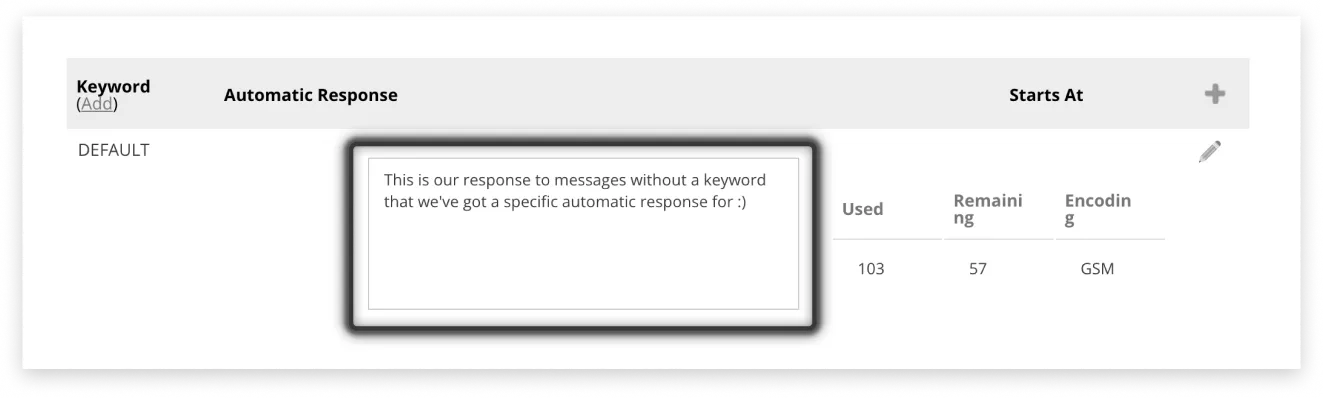
Craft the perfect response to the person’s mistake (making sure you keep to the 160 character limit to avoid two SMS message charges). Then click the ‘Save’ button.
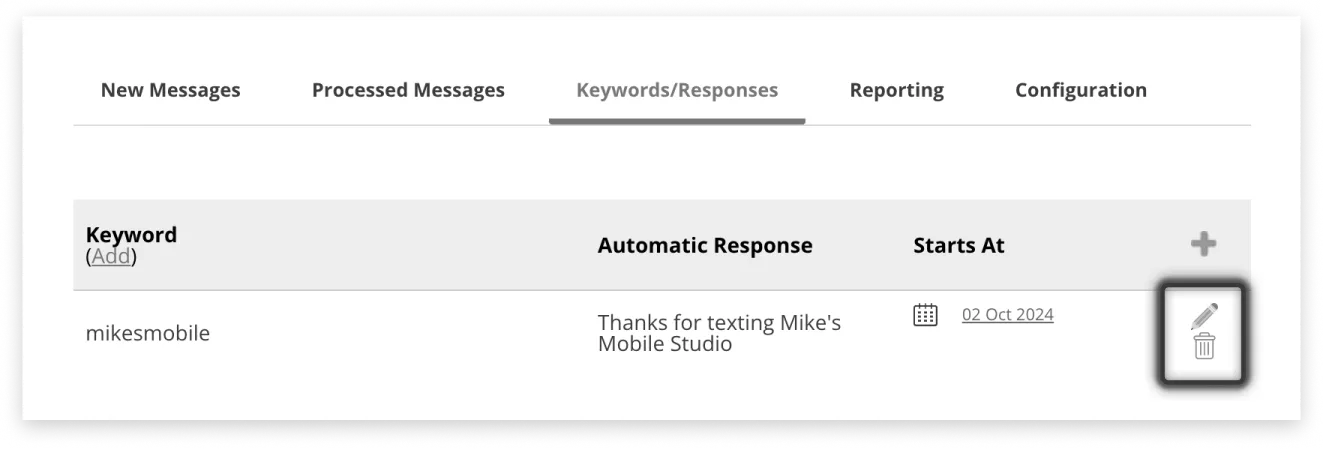
Edit or Delete a Response
So you want to make a change to one of your automatic responses?
Editing a Response
Select the Keywords/Responses tab and then click on the pencil in the far right column.
You can now make changes to your automatic response.
Deleting a Response
Deleting message responses are as easy as, but not quite as satisfying, as pie. Simply:
Click on the Keywords/Responses tab.
Select the red bin icon on the far right column.
Click ‘OK’ when asked “Are you sure you wish to delete this keyword?”.
Unless of course you’re not sure. In which case, don’t click ‘OK.’ Once it’s gone, it’s gone.
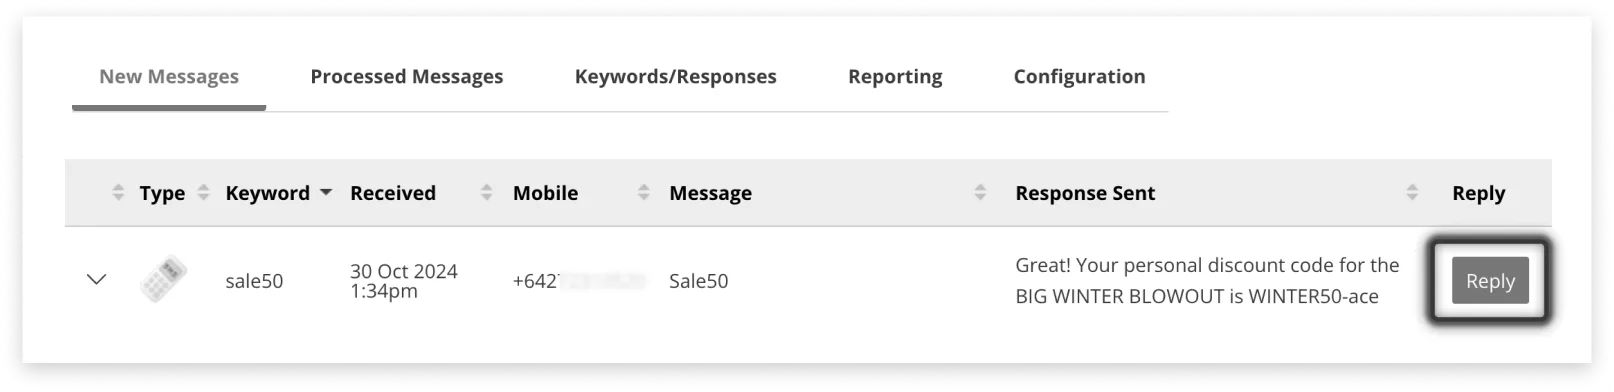
Manually Reply
If you simply want to send a special reply to a specific user, select the ‘New Messages’ tab and click the ‘Reply’ button next to your chosen received message.
Note: this is an optional feature, if you would like to have it enabled, please contact support or your Account Manager.
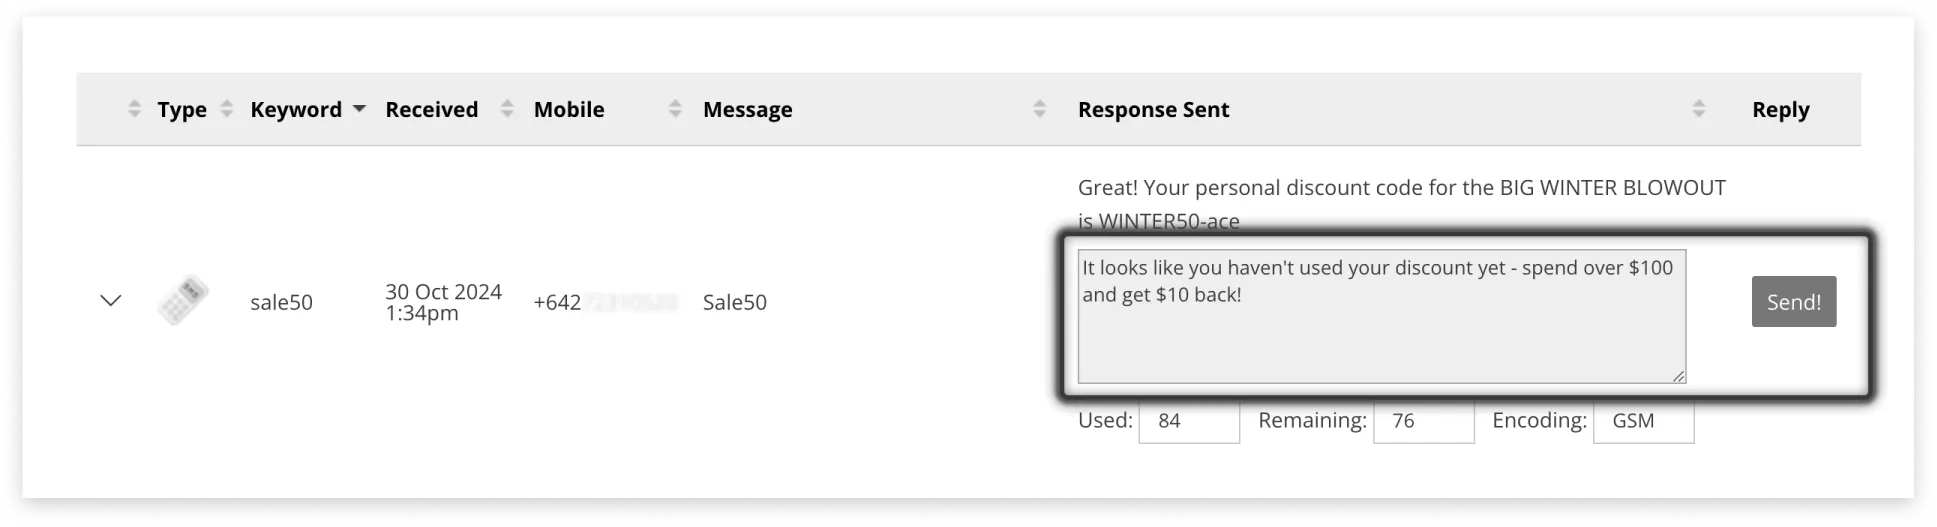
Write in your response (keeping to the 160 character count limit) and click ‘Send’.
Download a Summary
You may want a record of all the messages that you’ve received.
Navigate to the ‘New Messages’ tab and scroll to the bottom of the page.
Below the table of responses, you’ll see another table with date ranges.
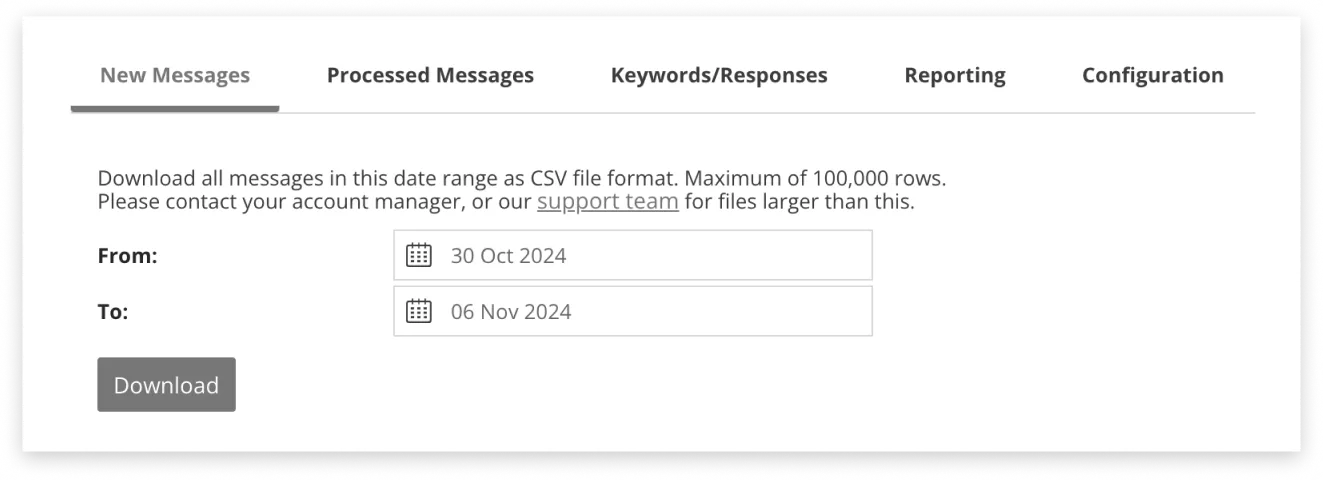
Select your dates by clicking on the calendar button or by typing them in and click the button to download your CSV file.
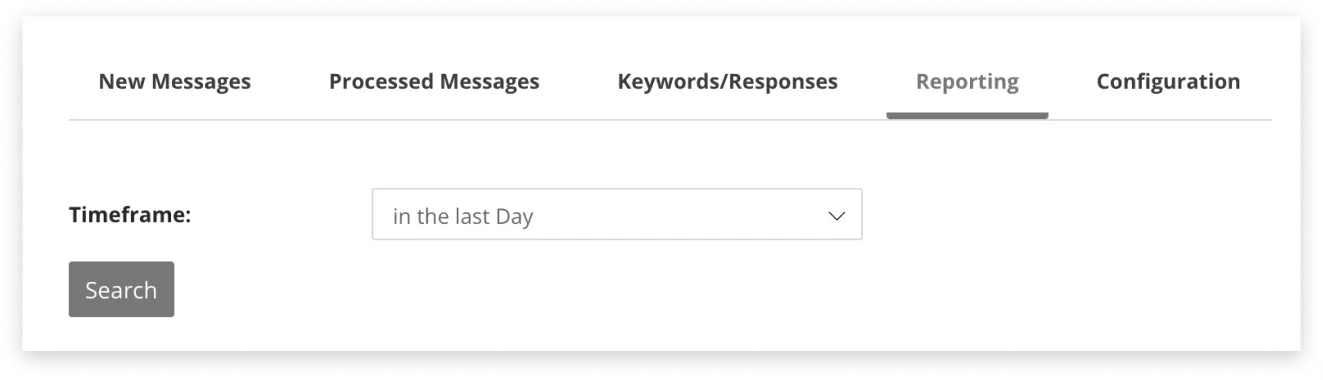
View a Summary
For an easy summary, select the ‘Reporting tab’. You will be able to see the number of messages and the number of replies.
If you would like to see more detail on messages sent or recieved you can see this under Data & Insights in the side menu.
Mobile Report: Mobile Report can be used to see transaction history between a particular mobile and Mobile Studio.
Mobile Analytics: This can show aggregated volume by gateway / shortcode / carrier to help reconcile entry volumes.
Configure the Dashboard
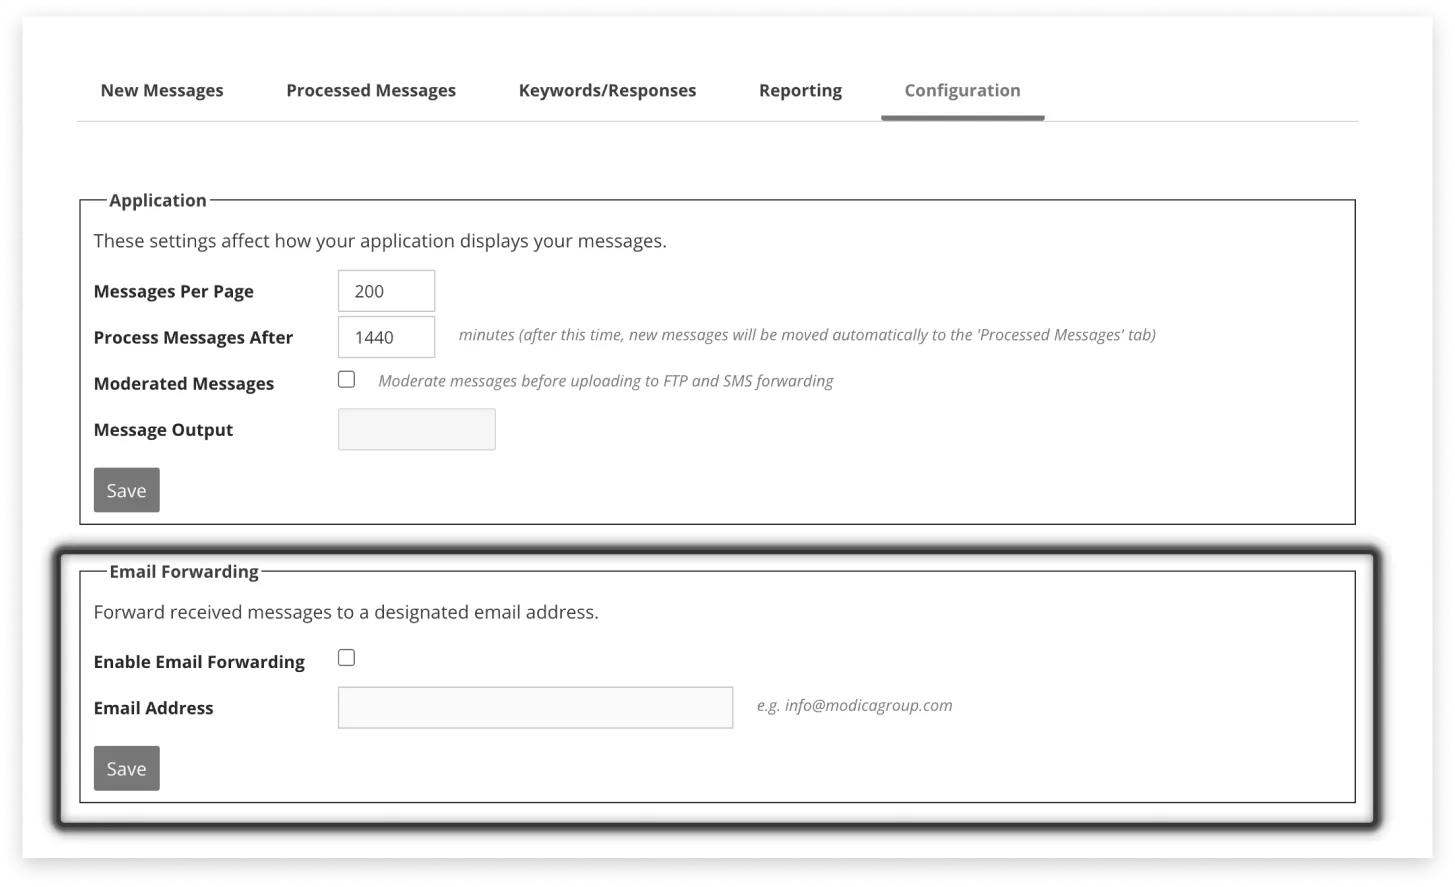
You may want to get specific on how many messages you want showing in the ‘New Messages’ tab before they are moved to the ‘Processed Messages’ tab. If so, you can do this by selecting ‘Configuration’ from the Dashboard.
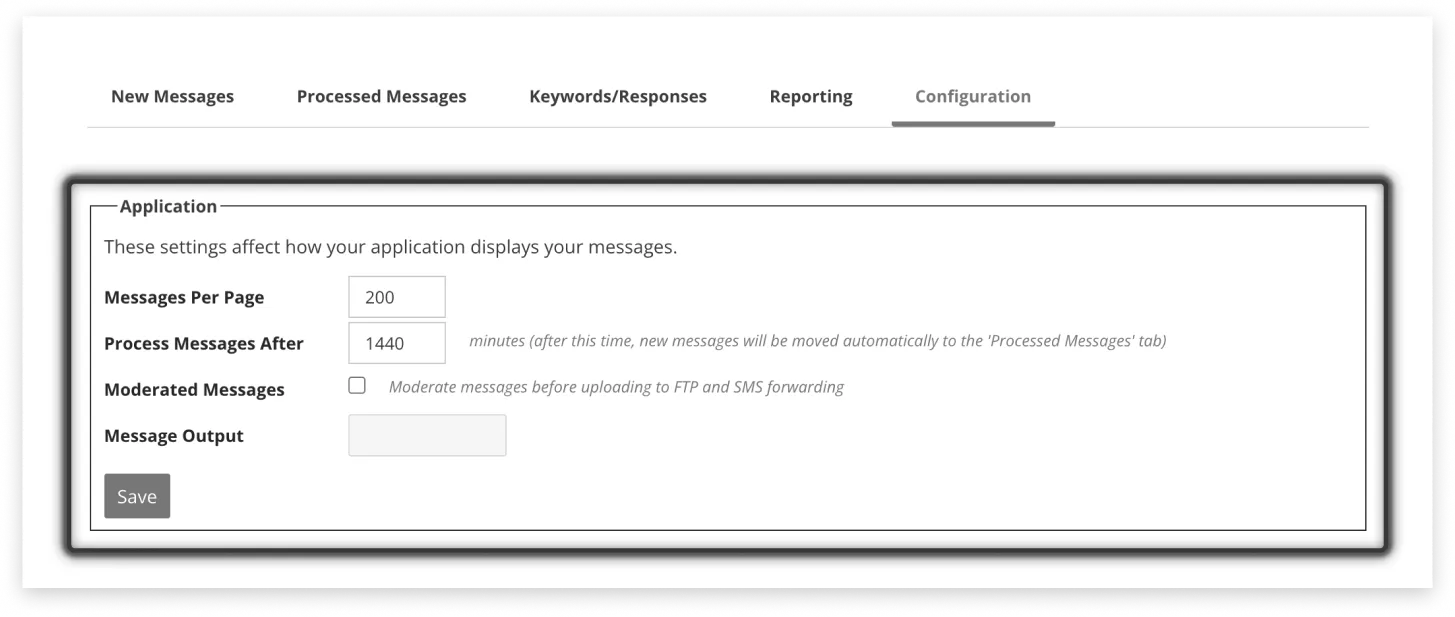
In the ‘Application’ box, type in how many messages you want to be displayed per page and adjust the time before messages are processed.
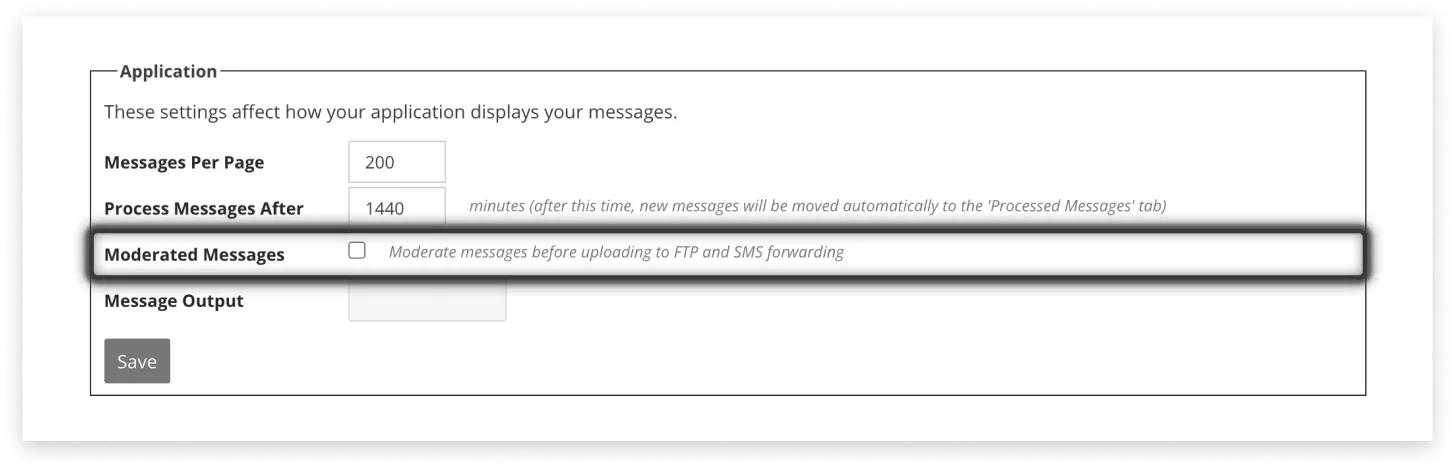
Tick the box if you want to moderate messages ( approve messages) before it goes to SMS forwarding (for more info on SMS Forwarding,click here ). Then click the ‘Save’ button to confirm your settings.
Forward Replies to Email
To process your received messages more efficiently, you may consider setting up an email forward.
To do this, select the ‘Configuration’ tab.
From there, it’s pretty simple. Under the ‘Email Forwarding’ box, tick ‘Enable Email Forwarding’, then type in the email address you want messages to be sent to.
Click the ‘Save’ button to set your changes.
Note: If you would like to set up email forwarding per keyword this can be done one the ‘Keywords/Responses’ tab as described here
When you configure the Keyword level email address as well as the Application level email address it will be sent to both email addresses.
Forward Replies to Mobile
You can forward received messages to a mobile phone, to make message processing even easier to manage on the go.
Click on the ‘Configuration’ tab in the main Mobile Studio Dashboard.
Under the ‘SMS Forwarding’ box, tick ‘Enable SMS Forwarding’ and then enter the mobile number you wish messages to be sent to (starting with the country code). Click the ‘Save’ button to finish.
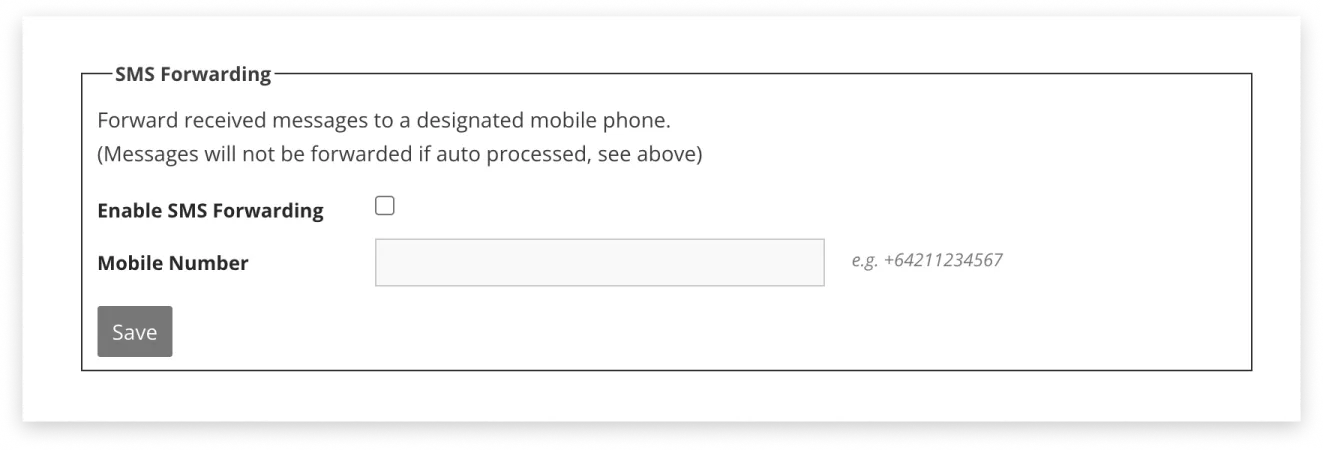
Note: messages will not be sent if they’ve been auto processed. You can learn how to configure message processing here
Hide a Particular Mobile
If there is a mobile number that you don’t want to see you can filter their number and messages from your Mobile Studio inbox.
Click on the ‘Configuration’ tab.
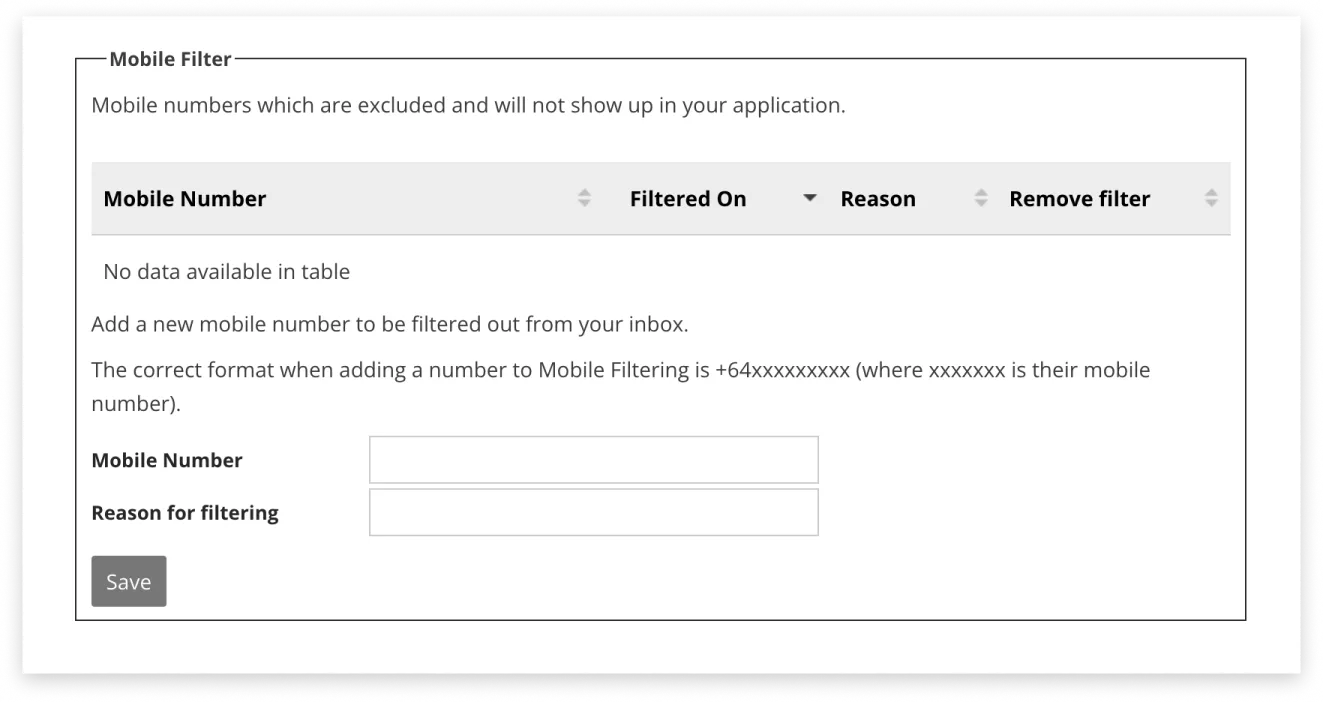
In the ‘Mobile Filter’ box, type in the mobile number you’d like to filter and, if you’d like, the reason for filtering that number (like “terrible taste in music”, or “won’t stop texting expletives” ).
Then click the ‘Save’ button.
If a mobile number manages to get back in your good books, just click the cross button in the far right column of the corresponding mobile number to see their messages again. Then when prompted, click ‘OK’.